
Mushroom shot - behind the scenes 30/8/2014
Once again I venture out in to the Australian Botanical Gardens, Mount Annan. After two weeks of rain there are little much rooms starting to stick their heads up everywhere, Today I started by going to an area known as the Wollemi walk of discovery an small walking track here they have planted several of the rear and endangered Wollemi pines, this area often has several types of mushrooms growing so a small area that will give me a variety, however today there was only one very tine one just starting to grow, This is the same spot where to took the Orange mushrooms growing on the small vertical dirt wall, so again they are starting to grow again after the rain, that shot (The first shot in my mushroom gallery in my under the portfolio tab). A side note today the gardens announced the winners of their Budding photographer competition and that shot won the Up close and person category, so that’s two years running now my Mushroom shots have taken out that category. So I managed to get a few shots of this little mushroom and think over the next few weeks as it grows I’ll get a few more. You’ll notice from this behind the scenes shot the camera was balanced of a rock with water flowing around it so still quite wet around the gardens at present.


I then went walk-a-bout around the gardens for a while before returning back to the normal patch where I took three separate sets of shots on three different mushrooms. From the behind the scenes shots you’ll notice the small wooden blocks I carry around to level the camera to assist in framing the shot, it helps to raise the camera body at times even with the camera on the ground depending on the location of the mushroom and the slop of the ground. So I got four separate mushroom shots today so a good day plus some pocket money from the competition so all up a good day in the gardens today.


Thanks for dropping by,
Glenn
100 f2,8 L macro lens review
G’day welcome back to my blog, Today I’ll cover my first L lens I got and the one I thought I’d be talking about last week my 100 f2.8 L Macro lens, When I first got this one I was a permanent fixture to my camera I sued it for everything, the difference from the old kit lens I had left over from my 350D was amazing, The quality of the images coming out of it was so much sharper and clear. It became my default lens for quite some time. The lens is a macro lens and it is the lens used on all my Mushroom shots, (You can check these out in my mushroom gallery under the portfolio tab) The closest I can put a subject to the lens is about the distance you can get when you use the lens hood, which I always use on this one, This is also one of the few lenses I don’t use any filters on. Some people say to use filters to protect the front element of the lens and on a lot of my other lens I do have filters either circular polarisers or skylight filers to remove the UV haze, but on the macro lens used now primarily for macro work I don’t have any filter and rely on the lens hood to protect the front element. It’s no longer the lens that’s permanently attached to my camera that’s the 70 – 200 these days so the lens is in the camera bag until I find mushrooms or something else to have a go at. As well as macro work the lens makes a get portrait lens and the f2.8 wide open gives a great effect, while on macro work the f32 stepped down size gives a great depth of field and still sharp images. I’ve taken a lot of images with this lens over 7600 shots and it’s probably my favourite lens though last week’s list showed more shots taken with the 70 to 200, but I’m putting that down to the use of burst mode on the wild life shots to boost the shot count on that one. The lens is a great lens and I’d recommend it to anyone looking to get into macro or portrait work. One I’d certainly miss if I didn’t have this one in my bag.
Thanks for dropping by the weekends blog again will be how I got a shot and next weeks gear review from my bag will be the next lens I obtained and a great around walk around lens, the one I recommend if anyone asks me what one lens should I have.
Glenn.
Mushroom shot 23/08/2014
This week I headed out to the Australian Botanical gardens, Mount Annan, only a little less organised than usual. The recent rains here in Sydney gave plenty of new opportunities for Mushroom shots and I managed to get a few bird shots as well., Today I’ll go through a mushroom shot again, starting with the first shot the scene and lighting conditions, form this shot you can see what the light is like and the little mushrooms all waiting to be captured. I usually select a few to take and set up and take a series of shots on each.

The next shot something I don’t normally do I moved the dial to P mode so you can see what the camera would take if it’s up to its own choosing, as you can see it tried to lighted the shot by opening up the aperture and hence lost the depth of field, you also see how washed out the shot looks. This shot is not flash even though the flash fired it wasn’t pointing at the scene so it’s all available light. The day was very overcast and after I get these shots it started to rain so that was the end of the day shooting.

The next image is again straight out of camera no editing, but this time with flash and full manual mode, This is where I found out how unprepared I was today First I realised I didn’t bring my remote trigger for releasing the shutter so I had to be careful each shot not to move the camera, I set it on 2 second timer. The camera was balanced on bark ships to get the framing right, none of today’s images have been cropped the framing is as per the set up. I then set up my two flashed and when to take the first shot, its then my next problem came to me, one of the flashes had run out of juice so forgot to charge the batteries for it, so luckily I had one working and a have a small piece of aluminium foil in my camera bag I sometimes use as a reflector and today it got a good work out. SO like normal I step down the aperture to maximise my depth of field and bring up the shutter speed to sync speed, this gives the dark to black background and the only light on the mushroom is the side light from the 8” softbox and some reflected back from the aluminium foil. So I try several variations on the lighting angles, and flash power till I get the look I like one with some shadow and highlights and try and get lighting into the gills to bring them out.

The final shot is the one after the processing work in lightroom as explained in last week’s blog, this shot followed the same process, contrast, clarity, darkening the blacks and dropping the highlight a fraction. The final shot here is the one that I put out each week on google plus.

Hope you enjoyed the behind the scenes look again and it hasn’t spoilt the magic for anyone.
Thanks for dropping by.
Glenn
My Bag - 21/08/2014
G'day welcome back to my blog, as usual the mid-week blog will be all about what gear I have and why, for the next few weeks I'll run though my lenses what I have and why. I'm going to start with the lens I use the most and sitting down to this I was surprised to find out it wasn't the lens I thought it was or would be. Light room collects a lot of data about each photo and has a really useful database of it all, for each shot it not only collects your camera settings but what lens you used and the focal length at the time as well, so sitting down here to write this today I thought I’d be righting about my macro lens but turns out not the case, and by quite a long way in fact. So it turns out my most shot with lens is my 70 to 200 f2,8 IS USM II coupled with the 1.4X extender.
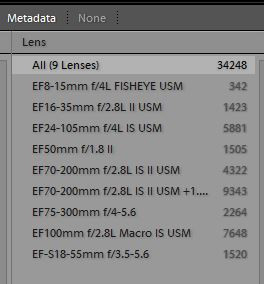
Looking at the lightroom count I’ve taken 13665 shots with this lens with and without the extender, the macro lens is next but that comes in at 7648 shots so the long lens has taken way more shots. At first I was surprised but then thinking about it, not really, the long lens I use a lot for bird shots and these are often in burst mode, so the count soon adds up.
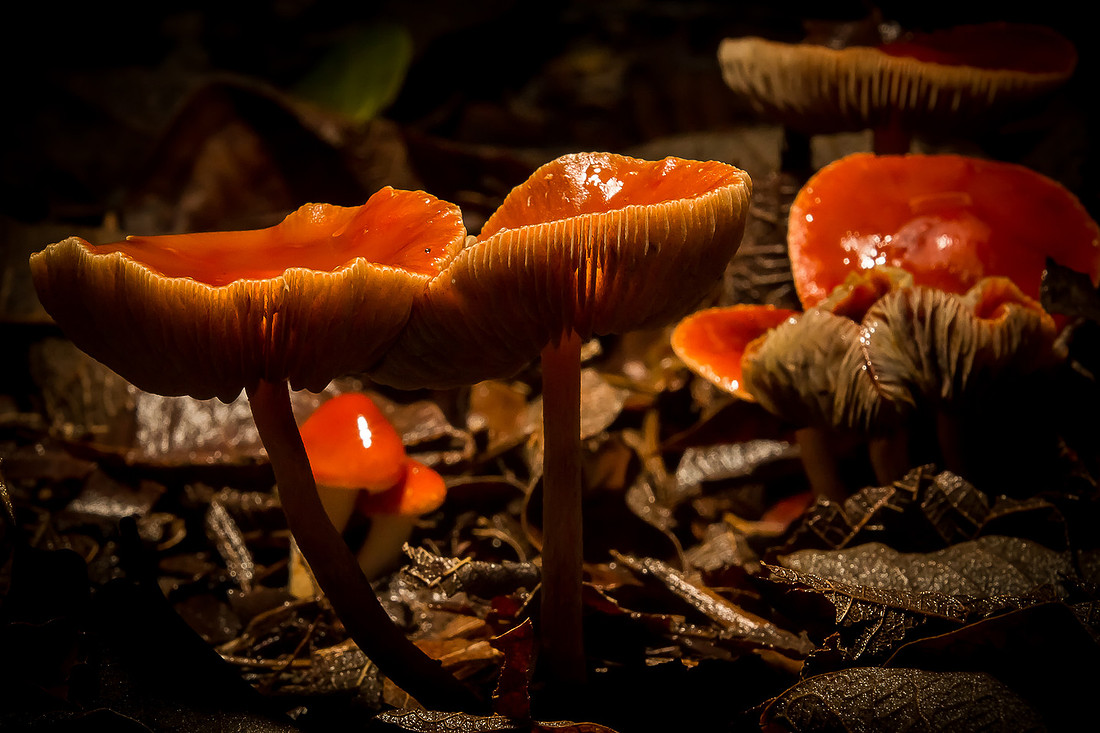
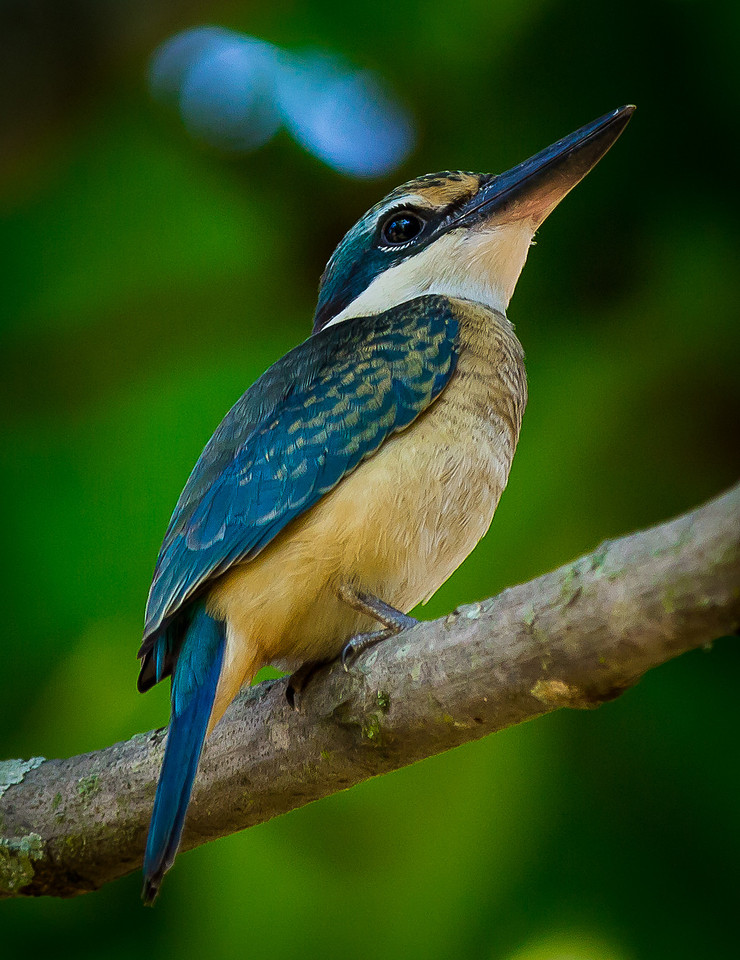
The lens is the heaviest I have so I certainly know about it carrying it around, but it certainly gives great results and the image stabilisation is something else hand holding down to lower shutter speeds of 1/30 of a second at times at full reach. Thou some of those shots aren’t always the best. I’ve used the lens for some close up mushroom shots and a lot of bird shots, I’ve found that my best results are still found with it mounted to the tripod with the tripod mounted at the lens collar not the camera body, the collar nicely balances it out so less stress on the camera lens mount. The 1.4 extender gives you the extra reach but you sacrifice the f2.8 to an f4 so loose some light, but I can still get some nice background blur with f4 and often find I need to step further down to get a complete bird in focus with depth of field being somewhat limited at f4. I’ve also used this set up of the 70 to 200 with extender for a photo shoot for a works soccer match with the office vs the factor match held annually, and from the side lines got great results and some close ups.
The down side is certainly the weight and I may be needing to replace a camera strap soon as it’s starting to show signs of wear where the strap joins the camera even though I usually hold the camera while walking there is still signs of wear there now and I don’t like the idea of camera and lens taking a tumble. The only other issue is the size of the len extender and lens hood they make for a decent length and if I need to change out the lens I have to take off the lens hood and then it’s a stretch to fit in the Lowepro slingshot bag I use. These are minor things but still something to consider, but I find the shots I get with this lens and extender are still making me very happy, At times I’d love a little longer reach and I’m waiting to see what the new Canon 100 to 400mm will be when it turns up, also its price, there are a few alternatives to longer lenses like the Sigma and Tamron 150 to 500mm which I’ll be having a look at before I decide which way to go when the time comes for a longer lens. But for now the 70 to 200 with 1.4 extender is doing a great job and I’m happy with the results, and it’s easy to see why It’s the lens in my bag that’s not in the bag so often.
Thanks for dropping by, and I’ll be back on the weekend with more on how I came by a shot I took then, The paper daisies are in full flower now at the gardens this weekend by the sounds of it so could be the place to be.
Glenn.
Light room work flow 16/08/2014
G'day welcome back to my blog, Well today didn't quite got to plan, So I didn't get to go out shooting today :-(. very rear that on a Saturday I don't get to head out. So due to a few computer issues, mainly the whole thing here died and had to be repaired at the local computer shop, which involved them installing a fresh copy of windows in the end with nothing else installed, so I've spend the rest of the day trying to get things to come to life here, just got lightroom back up and my catalogue loaded again, now that was a sigh of relief, I tell you. This time I've signed up fro the photographers creative cloud so I now have the full photoshop as well now instead of photoshop elements, guess a new learning curve coming up here then. So no photography today, but I do now have a partially functioning PC, still yet to install MS office etc, but I have lightroom so I'm happy. :-)
So by now you will have realised that Light room is the main stay of my photography back end. It's where I do all my post processing and cataloguing, key wording and geotaging. I find it a great tool and relatively simple, we'll see how we go now we have Photoshop to play with how much trouble I can get into.
To start with I take the SD card from my camera and place it in the card reader in my PC. The files are all raw files as it containing the maximum data for each image so I have the best chance of getting all possible use out of each image. So I import the images firstly into light room and at the same time convert them to a DNG format with in lightroom. the DNG format gives me piece of mind in that the file now contains all the data and edits in the one file with out the use of a secondary side car file which I would have if I used the raw file. It also means that if I took the DNG file else where there is a chance other software could read it, so should one day lightroom disappear (Not likely) then I still have a usable file. Ok with in lightroom I file the photos in a separate date folder so there is a main year folder then a date folder within that year, That's if for the filing, the joy of light room is the ability to be able to search and there are so many ways to search, key words, metadata galore. (more details in a future blog).
The description below is the settings I use for my mushroom shots.
Once I have the files uploaded into lightroom, usually takes a few ten to fifteen minutes for around 150 shots from a Saturday, (I usually start to prepare tea while that's uploading and converting to DNG, Once Tea's simmering away I come back to the computer and pick the better shots from the day to work on, not always an easy task, So I scan through the thumb nails of the images and score then 1 to three only every deleting the absolute worst shots if any, anything in focus is never deleted no matter how uninteresting it is. I then set the filter two two or more starts and start with each subject, I then go into survey mode in the lightroom library mode where you click on the images to remove and each time you do the list is reduced as you go through them the images get large so you are finally left with what you think is the best image, this is the one I will now work on in light room for a while, starting in the develop module I start with exposure adjust if required, usually not much needed here, then contrast usually uping this a little, maybe as much as +50, depending on the shot, I usually back of the highlights a little as the stem is often blown out a fraction form the flash or some times a highlight on the cap of the water spray, so the highlights are backed down, next following down the sliders the shadows I boost a little to bring out as much detail as I can of the gills under the cap, Whites also get a slight boost but not as much as the shadows then the blacks I bring down to get a dark back ground, though a lot of this is from within camera when I underexpose the original shot and use the flash to fill in the light locally. I'll then move the clarity slider to the right as much as I can while still leaving a natural look to the shot so this ends up about +55 there abouts again depending on the shot. Vibrance and saturation are also bumped up to around +20 each again to a limit that still looks realisist, but brings out the colours, the water spray helps this a lot as well.

Depending on the shot I may also go into the hue, saturation and luminance sliders and bring up the luminance on certain colours, usually reds, oranges and yellows and possibly some greens. I'll add a little sharpening say to around 70 and some noise reduction even though shooting at ISO 100 gives me little noise I still reduce some as Iv'e boosted the shadows and that will bring up some noise.

In lens correction I will pick the lens I use in the lens calibration section which removes any lens distortion and finally I'll add in some post cropping vignetting to about -60 with some feathering and adjust the roundness and mid point so as not to cut out the mushroom, I'll then go back to the top and maybe crop the shot to bring the mushroom to max size and where possible keep the the rule of thirds.
It seams a lot of editiing but in reality it only takes a few minutes and once done I can copy it across to all the shots via synchronise. I can usually to these in about ten minutes for around 40 shots total these days, Ill then export them including my copyright watermark and have them ready to upload into google plus or one of my Zenfolio gallaries here.
Next mid weeks blog back to about my gear, thanks for dropping by.
Glenn.